Setting a proper hookah always remains a challenge for beginners and often for some veterans. Indeed, it is difficult to pack your hookah properly if you don’t know the basics or are missing out on something.
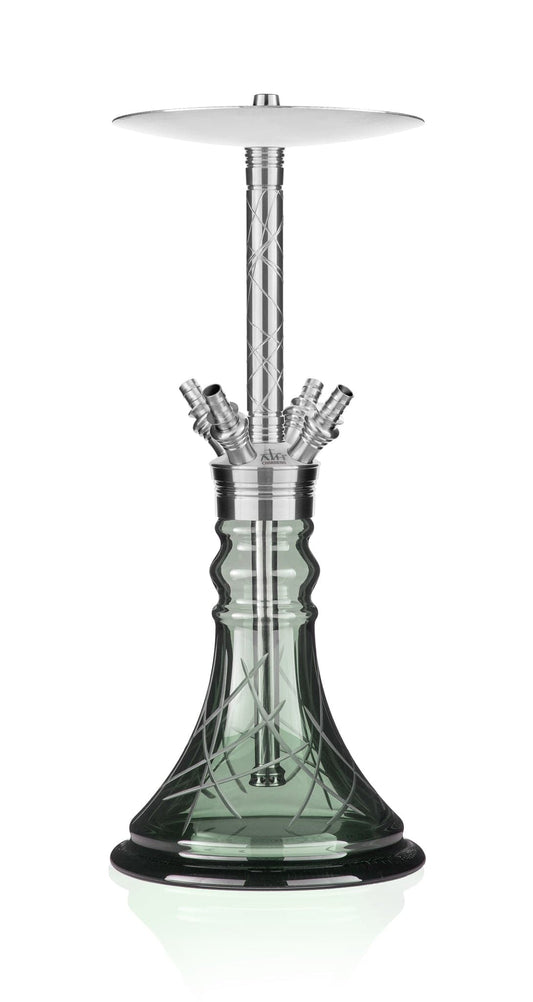
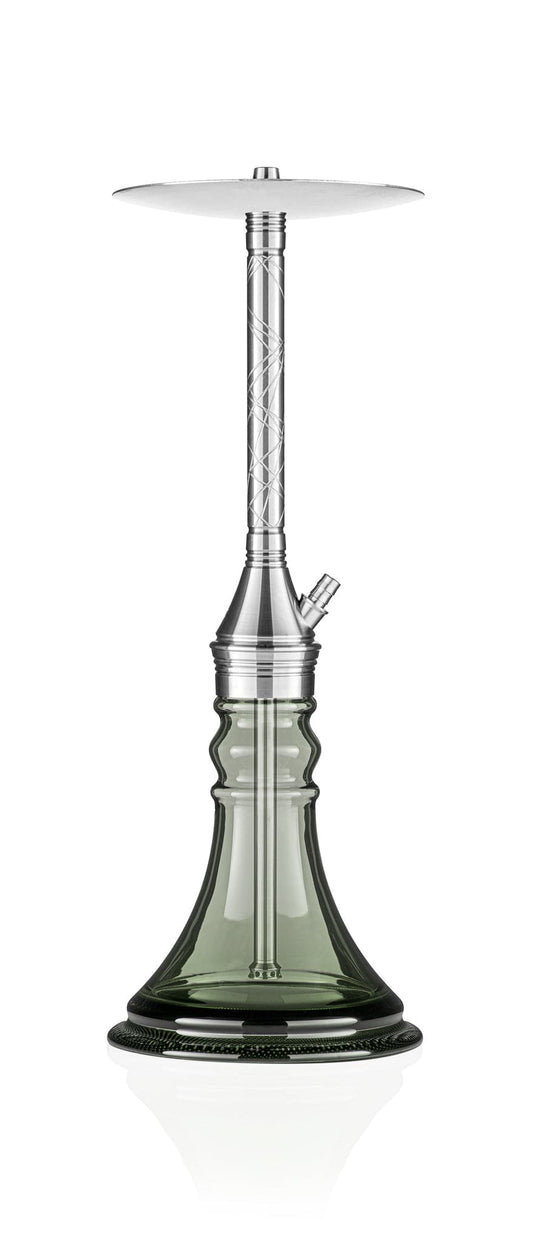
This article will critically focus on each aspect of hookah setup and creating a memorable smoking experience. To ensure a perfect hookah experience, it is necessary to have all hookah parts available:
- Base
- Down Stem
- Shaft
- Hose
- Hose Connector
- Hookah Ashtray
- Bowl
- Foil Cover or Metal Screen(HMD)
- Shisha
- Air Valve
- Mouth Tip
1. Clean Your Hookah
Start with cleaning your hookah including the hose, base, shaft and bowl. It is necessary to clear the space so that airflow can be fluent and the hookah is free from any other harmful elements which may affect your smoking experience.
Disassemble all the parts of the hookah and use a thin long brush soaked in the mild wash to reach every nook and corner of the hookah. However the hose should be taken care of while washing your hookah. Why? If the hose has waterproof elements like plastic and silicone, wash it with a thin brush or else do not clean it.
Some hookahs are made of metals similar to traditional hookahs which do not have a waterproof hose. Washing it with water and mild soap can result in corrosion of the metal and make your smoking harmful.
Also, wash your hookah before and after every session or each time you see any residue on the vase or the taste doesn’t seem favorable.

2. Pour The Cold Water
The next step is to pour the cold water into the vase. Why cold water? Coldwater is proven to give dense white clouds which cannot be formed otherwise. However, you can use different liquids to rejuvenate your hookah sessions like wine, milk, ice, whisky, etc.
However, these experiments should be studied overall to ensure you have a non-harmful smoking session. If you are a first-timer, use cold water or ice or a proportional mixture of ice and water to create dense clouds.

3. How much water to pour?
The size of the vase decides how much water should be poured. Collectively, pour water to the level of one inch or 2.5 cm rising the down stem ensuring there is sufficient space to form the clouds.
The smoke should pass from the water, allowing the vase to form the smoke. In case, you have a mini hookah, try to raise the level only an inch above the down stem.

4. Tuck Shaft Into The Vase
Next, tuck your hookah shaft into the base carefully to ensure it is airtight and dips right to the level of water discussed above. Do ensure you have a rubber or silicone piece above the base which determines the tightness of the shaft and vase.
In case, you have one but are either failing to fit, splash a few drops of the water or dish soap around it. It is necessary to tick this fact or it can result in forming thin smoke and can make smoke difficult to pull.
Test the shaft before starting your hookah session by surrounding the base connector with your hand and feeling the air passing. If you feel the air passing then the shaft has not fit properly and vice versa.
5. Connect The Pipe With Hose
The next procedure is the hookah pipe setup. The proper connecting of the hose is very important as it is the transporter of smoke to the user. Like a shaft, the hose should also be airtight with the shaft hole so the smoke is intact inside the hookah and no thin air is pulled.
There can be one to three or four holes to connect to hoses; ensure you use quality rubber or silicone pieces to hold the air in each one of them. In case you are smoking alone, connect all the hoses equally for uninterrupted smoking sessions.
When you initiate the hookah pipe setup, move the hose round along with the rubber or silicone piece to the right side. This tightens the hose for a long session.

6. Check The Air Flow
As discussed above, checking the airflow is the most essential part of the hookah steps. Check the airflow by putting your hand around the shaft connector and pulling out the air.
If you feel the air pulling out from the shaft connector then fit your shaft with a vase well.
7. Place The Hookah Ashtray
A hookah ashtray is used to collect the ashes from the hookah coal or catch the embers falling. It is placed above the shaft and below the bowl. Place your hookah ashtray above the shaft body after you are done checking the airflow.

8. Stir The Shisha
Shisha is a hookah tobacco flavor that is generally made from glycerine, molasses, tobacco and different flavors. Grab your fresh shisha out of your collection and stir the shisha to distribute the juice evenly in the tobacco.
P.S Do not be fooled by the misconception of squeezing out the juice from the tobacco as it can eliminate the element that can produce flavor. Also avoid crushing the tobacco evenly in a paper towel to eliminate its juice. You’ll only end up burning your tobacco frequently and ruining your tobacco flavor.
Take out a certain amount of tobacco from the pouch with a fork or spoon and stir it evenly as the juice settles mostly in the lower part of the pouch. Now evenly distribute the tobacco into the bowl by sprinkling it with your fingers but keep the center of the bowl free.
Put the tobacco lightly into the bowl to make space for placing the aluminium sheet.
9. Pack The Bowl
Do not overfill the bowl. Make sure you leave about 1-2 mm space below the bowl for air to move freely otherwise the tobacco might get burned by the coal placed above. This is the major precaution which determines the long-lasting refreshing hookah session.

10. Cover With Foil or Metal Screen
Now you are up to cover your bowl with a metal screen or heavy-duty foils. Why foils? Because you need to cover your bowl with two heavy duty aluminum foils so that your upper layer of the tobacco doesn’t get burned.
Make sure you leave no wrinkles, avoid wrinkling, and put your foil drum-tight on your bowl. Next pick a hole poker and poke at least 12-15 holes onto the foil. Use a light hand and try to not tear the foil apart.
If you don’t have a hole poker, you can use a toothpick for making the holes.
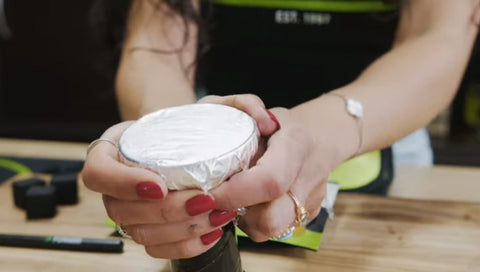
11. Poke Several Holes In The Foil
The recommended number of holes is 12-15 at least. However if you want to increase the airflow, you can make more holes as you need to pull out a good smoke, usually you’ll need 20-25 holes at least if you have more than two hoses connected to the shaft.

12. Light The Coals & Transfer Them On The Foil
Several types of coal can be used for hookah like natural coal, instant coal, coconut coal etc. Natural coal is coal that is not refined and comes straight raw. It takes time to burn but continues for a longer period.
While instant coal is refined coal that is added with elements which make it easy and quick to burn. However this does not continue for a longer period. Similarly coconut coal is a type of instant coal which quickly burns and does not continue for a longer period, however it helps produce more dense clouds than other coals.
Pick any coal that is mentioned above and break it into 2-3 smaller parts. This is because the coal should not be placed completely in the center as it may burn the foil. Next, hold the coals with a tong and light them. Once it is completely burnt, place the coals on the edges of the foil.

13. Inhale
The most awaiting part of the hookah steps is finally inhaling the smoke and relaxing. But first, give your well prepared hookah at least 3-5 minutes to generate the smoke. Then enjoy your most relaxing step in the whole process.

Conclusion
Setting up a hookah is an art which does not require skill or talent; you just have to be light-handed and use it carefully. By following the steps mentioned above, you can easily prepare a long lasting hookah and have a refreshing session throughout.



Leave a comment